Hi Everyone and Happy Hump Day!
All good things must eventually come to an end and after much
consideration Monica Weaver from Add a Little Dazzle has decided to
close the Dazzling Diva Challenge. The blog and boutique will continue
being open offering unique creations and Add a Little Dazzle Craft Metal
Sheets. I invite you to continue following the Add a Little Dazzle
blog.
It is time for our final challenge at Add a Little Dazzle; we have a theme of 'Spring' for this, our last Dazzling Divas Challenge.
When I think spring, I think of getting out side and going for walks. I usually start out strong and take the dog for walks too. Sadly, this does not last for long. One of these days, I keep telling myself, one of these days!
I decided to use my poodle die from the Top Dog Dies Dog Days #2 Die Set and go with a Parisian theme and 'go for a walk'. I don't know about you, but I can't get enough of yellow, black and white. I used some Black Diamond Add a Little Craft Metal for the poodle die. To give it dimension and texture, I used the paper stumps from the Embossing Tool Kit.
The frame is cut with a die from Heartfelt Creations. Background stamps are Crafty Secrets.
I am linking up to Simon Says Stamp Work It Wednesday Challenge- 'Yellow'.
I hope you can join us this week and have one last chance to win a gift certificate for Add a Little Dazzle! You can link up your project on the blog, and you can purchase Add a Little Craft Metal HERE, in the store.
Have a blessed week!
Lee Ann :)
Showing posts with label Top Dog Dies. Show all posts
Wednesday, April 29, 2015
Wednesday, January 7, 2015
Add a Little Dazzle to Roses
Hello Everyone~
Is life getting back to normal for you? Here, I am back to work and some arctic cold has set in. Now that Christmas is over, I guess the next thing to look forward to is summer break!
With warmer temperatures on my mind, I created a springy card with a little help from the inspiration photo Monica has for us at Add a Little Dazzle~
Beautiful, isn't it?
And here is my card~
I focused on the wood grain background and those gorgeous metallic leaves. I stamped a woodgrain image in Early Espresso on kraft cs. A piece of vellum down the middle softens things.
Next, I chose some flower images and stamped them in shades of pink and die cut them out. My 'greenery' is actually bronze- Brushed Bronze Add a Little Craft Metal. I love using the metal for leaves as you can really mold them to create your floral spray. I added a few stamped leaves as well for contrast.
My sentiment is stamped on a Vintage A2 Mat Die from Top Dog Dies.
And that scrumptious ribbon. I was thrilled to be the winner of this and more gorgeous ribbon from The Stamp Simply Ribbon Store during the Coffee Lovers Blog Hop. A few pearls finish the card.
My sketch inspiration is from Fusion
I am also linking up to Simon Says Stamp Monday Challenge, Something Old (stamps) and Something New (ribbon).
Is life getting back to normal for you? Here, I am back to work and some arctic cold has set in. Now that Christmas is over, I guess the next thing to look forward to is summer break!
With warmer temperatures on my mind, I created a springy card with a little help from the inspiration photo Monica has for us at Add a Little Dazzle~
Beautiful, isn't it?
And here is my card~
I focused on the wood grain background and those gorgeous metallic leaves. I stamped a woodgrain image in Early Espresso on kraft cs. A piece of vellum down the middle softens things.
Next, I chose some flower images and stamped them in shades of pink and die cut them out. My 'greenery' is actually bronze- Brushed Bronze Add a Little Craft Metal. I love using the metal for leaves as you can really mold them to create your floral spray. I added a few stamped leaves as well for contrast.
My sentiment is stamped on a Vintage A2 Mat Die from Top Dog Dies.
And that scrumptious ribbon. I was thrilled to be the winner of this and more gorgeous ribbon from The Stamp Simply Ribbon Store during the Coffee Lovers Blog Hop. A few pearls finish the card.
My sketch inspiration is from Fusion
I am also linking up to Simon Says Stamp Monday Challenge, Something Old (stamps) and Something New (ribbon).
We would love for you to join us this week; you do not have to use Add a
Little Dazzle Craft Metal, but if you have it we would love to see it!
Check out the rest of the inspiration from the uber talented Design Team and then link up your creation on the Add a Little Dazzle Blog!
Are you thinking it is time to give Add a Little Dazzle Craft Metal a try?
Have a little Christmas cash to spend?
You can purchase Add a Little Dazzle Metal HERE.
If you purchase from a the link on my blog, I thank you in advance as
I get credit for your purchase.
THANK YOU!
Have a Blessed week!
Lee Ann :)
Supplies Used-
Stamps-flowers-Papertrey Ink, WPlus9 -sentiment, Hardwood background stamp-SU, leaves-Heartfelt Creations
Paper-Crumb Cake, Vellum SU, Neenah Solar White
Ink-SU Early Espresso, Blushing Bride, Strawberry Slush, Crumb Cake, Memento Tuxedo Black
Other-Add a Little Dazzle Craft Metal in Brushed Bronze, Heartfelt Creations leaves dies, Paper trey Ink matching flower dies, Top Dog Dies Vintage A2 Mat die, ribbon- Stamp Simply Ribbon Store, pearls
Friday, December 26, 2014
Wow! Where did this Season Go??
Hello Friends!
I am still trying to figure out how the Christmas season got away from me; where has the time gone? And goodness, you blink and Christmas is over!
If you are like me, you are doing a little end of year cleaning and purging. I will have pics in another post of my huge craft room re-do! Time to put all of those Christmas stamps and die sets away for another year, right? HOLD ON! You can use your dies for other purposes. Take the Top Dog Dies Ornament and Tags #1 Die Set; I went a little crazy with it, making lots of Christmas cards with it this season. But, turn your die upside down and what do you have??
The background was made using the bokeh technique. I have been wanting to try it for forever! I did not watercolor my background though, I sponged it. The white craft ink tended to blend a bit with the red ink, making it a little more pinkie than I would have preferred, but then it IS a Valentine's card!
I am still trying to figure out how the Christmas season got away from me; where has the time gone? And goodness, you blink and Christmas is over!
If you are like me, you are doing a little end of year cleaning and purging. I will have pics in another post of my huge craft room re-do! Time to put all of those Christmas stamps and die sets away for another year, right? HOLD ON! You can use your dies for other purposes. Take the Top Dog Dies Ornament and Tags #1 Die Set; I went a little crazy with it, making lots of Christmas cards with it this season. But, turn your die upside down and what do you have??
That's right! This Hershey's Kiss is made with the Ornament and Tags #1 Die Set.
How cool is that?? I love that you can get multiple uses from this die set!
The background was made using the bokeh technique. I have been wanting to try it for forever! I did not watercolor my background though, I sponged it. The white craft ink tended to blend a bit with the red ink, making it a little more pinkie than I would have preferred, but then it IS a Valentine's card!
The sentiment strip was cut free hand and stamped with a sentiment from Sweet 'n Sassy Stamps Valentine Critters Stamp Set. I Used the sketch from CAS(e) This Sketch (although I am not really sure that this is a cas card even though it started out that way!). I used the Top Dog Dies Banners #1 Die Set for the scalloped element in the sketch.
I almost missed the challenge at Shopping Our Stash, a two-weeker, focusing on the color red. RED is most definitely the dominant color in this card!
Thanks so much for stopping by and have a Happy New Year!
Lee Ann :)
Thanks so much for stopping by and have a Happy New Year!
Lee Ann :)
Wednesday, December 24, 2014
Merry Christmas from Top Dog Dies (and Me)!
Hello Everyone!
Just a quick post today as everyone is busy busy with last minute preparations for Christmas.
I am sharing a very simple and quick CAS card using a non-Christmas die for my card.
I used my Top Dog Dies Cool Cats Die Set and made them Christmas ready by adding scarf and holly. The scarf and holly are both dies from the Top Dog Dies Darling Deer Die Set. The sentiment is from Sweet 'n Sassy Stamps Christmas Silhouettes Stamp Set.
That's it! Quick, clean and festive! I love this card!
Just a quick post today as everyone is busy busy with last minute preparations for Christmas.
I am sharing a very simple and quick CAS card using a non-Christmas die for my card.
I used my Top Dog Dies Cool Cats Die Set and made them Christmas ready by adding scarf and holly. The scarf and holly are both dies from the Top Dog Dies Darling Deer Die Set. The sentiment is from Sweet 'n Sassy Stamps Christmas Silhouettes Stamp Set.
That's it! Quick, clean and festive! I love this card!
Thanks so much for stopping by and if you should decide to shop at Top Dog Dies with their great selection of dies, I thank you in advance for shopping with the links above as I get credit for your purchase. Thank You!
A VERY MERRY CHRISTMAS TO ALL!
Saturday, December 20, 2014
In the Home Stretch to Christmas!
Hi Everyone!
Are you finishing up all the last minute Christmas preparations? Wow! Where did the month go? While I cannot believe Christmas is almost here and I am soooo not ready, I am thrilled that it is Christmas Break!
I have another card made with Top Dog Dies, perfect for sending a festive note to a friend or family member~
I chose colors that are not my 'go to' colors, but that is good- getting outside the comfort zone! I die cut my Darling Deer from Glimmering Silver cardstock and mounted it on a pink Top Dog Dies Vintage A2 Mat. Gave my deer a Wild Wasabi scarf.
I die cut 'Hello' from coordinating blues using the Top Dog Dies Hello Die Set. I added a spring of holly using a die from the Darling Deer Die Set for a festive touch and finished it off with some sequins.
That's it for me, have lots of things to do before Christmas!
Lee Ann :)
Supplies Used-
Paper-Crumb Cake, Regal Rose, vellum, Island Indigo, Pool Party, Wild Wasabi
Stamps-none
Ink-none
Are you finishing up all the last minute Christmas preparations? Wow! Where did the month go? While I cannot believe Christmas is almost here and I am soooo not ready, I am thrilled that it is Christmas Break!
I have another card made with Top Dog Dies, perfect for sending a festive note to a friend or family member~
I chose colors that are not my 'go to' colors, but that is good- getting outside the comfort zone! I die cut my Darling Deer from Glimmering Silver cardstock and mounted it on a pink Top Dog Dies Vintage A2 Mat. Gave my deer a Wild Wasabi scarf.
I die cut 'Hello' from coordinating blues using the Top Dog Dies Hello Die Set. I added a spring of holly using a die from the Darling Deer Die Set for a festive touch and finished it off with some sequins.
That's it for me, have lots of things to do before Christmas!
Lee Ann :)
Supplies Used-
Paper-Crumb Cake, Regal Rose, vellum, Island Indigo, Pool Party, Wild Wasabi
Stamps-none
Ink-none
Thursday, December 18, 2014
Final Day to Get Your Free Die!
Good Morning Everyone!
The clock is ticking down- only 1 week to Christmas AND, today is the last day to take advantage of a great deal at Top Dog Dies. You can get the Snowman Globe Die FREE when you spend $70 or more!
I also have one more card made with the Ornaments and Tags #1 Die Set; yep I can't get enough of this die!
I went a bit rustic, yet elegant with this card, using Naturals White cs shades of brown and an evergreen print embossing folder. Contrasted that with Brushed Gold cs and a large, sheer red bow.
The clock is ticking down- only 1 week to Christmas AND, today is the last day to take advantage of a great deal at Top Dog Dies. You can get the Snowman Globe Die FREE when you spend $70 or more!
I also have one more card made with the Ornaments and Tags #1 Die Set; yep I can't get enough of this die!
I went a bit rustic, yet elegant with this card, using Naturals White cs shades of brown and an evergreen print embossing folder. Contrasted that with Brushed Gold cs and a large, sheer red bow.
If you shop at Top Dog Dies from one of my links, I thank you in advance as I get
credit for your purchase.
THANK YOU!
Thanks so much for popping in; have a Blessed day!
Lee Ann :)
Wednesday, December 17, 2014
Last Minute Christmas with Top Dog Dies!
Hi Everyone!
Wow! Just over 1 week and we will be celebrating Christmas! Are you like me, working on last minute cards?
The Ornament and Tags Set #1 from Top Dog Dies has been my go-to Christmas item this season. While entirely different, both of these cards were made with the Ornament and Tags Set #1.
I love the Nordic look and used the light blue, red and white color scheme to achieve that here. I also used the Gift Tag Die Set for the red mat behind the ornament.
The sentiment is from Sweet 'n Sassy Stamps.
Yep, I used the Ornament and Tags Die #1 Set for this card as well. The belt buckle was made with the tag from this die set. I die cut it from Brushed Gold cs and then punched a circle in the center of it. My black 'belt' was embossed with clear ep. Santa's suit was textured with the Modern Mosaic A2 Mat Die. Some 'fur trim' was added using one of the banners from the Top Dog Dies Banners #1 Die Set. My 'HO HO HO' ( I love the ho hos!) is die cut with the Holidays Die Set.
Did you know that Top Dog Dies has a great deal right now? Spend $70 and get the fabulous Snowman Globe Die Set FREE! That would be this snowman globe here~
But you have to hurry, as the special offer ends December 18th!
Wow! Just over 1 week and we will be celebrating Christmas! Are you like me, working on last minute cards?
The Ornament and Tags Set #1 from Top Dog Dies has been my go-to Christmas item this season. While entirely different, both of these cards were made with the Ornament and Tags Set #1.
I love the Nordic look and used the light blue, red and white color scheme to achieve that here. I also used the Gift Tag Die Set for the red mat behind the ornament.
The sentiment is from Sweet 'n Sassy Stamps.
Yep, I used the Ornament and Tags Die #1 Set for this card as well. The belt buckle was made with the tag from this die set. I die cut it from Brushed Gold cs and then punched a circle in the center of it. My black 'belt' was embossed with clear ep. Santa's suit was textured with the Modern Mosaic A2 Mat Die. Some 'fur trim' was added using one of the banners from the Top Dog Dies Banners #1 Die Set. My 'HO HO HO' ( I love the ho hos!) is die cut with the Holidays Die Set.
Did you know that Top Dog Dies has a great deal right now? Spend $70 and get the fabulous Snowman Globe Die Set FREE! That would be this snowman globe here~
But you have to hurry, as the special offer ends December 18th!
Thanks so much for stopping by! If you decide to shop at Top Dig Dies from one of these
links, I thank you in advance as I get credit for your purchase.
THANK YOU!
Have a Blessed week!
Lee Ann :)
Thursday, December 11, 2014
Top Dog Dies Sweepstakes!
Hi Everyone!
Just a quick post today to let you know about the Happy Holidays Sweepstakes at Top Dog Dies!
Check this out!
Be sure to pop over and enter to win!
Also, you can get a FREE Merry Christmas Die Set when you spend $50 or more; you have until December 14th at 11:59pm to take advantage of this offer!
There are tons of dies to choose from, including these Top Dog Dies~
Vintage Ornament and Tags #1 Die Set and Snowman Globe Die Set
Vintage Numbers, Snowman Globe Die Set and Gift Tag Die Set
Happy Shopping!
Lee Ann :)
Just a quick post today to let you know about the Happy Holidays Sweepstakes at Top Dog Dies!
Check this out!
Be sure to pop over and enter to win!
Also, you can get a FREE Merry Christmas Die Set when you spend $50 or more; you have until December 14th at 11:59pm to take advantage of this offer!
There are tons of dies to choose from, including these Top Dog Dies~
Darling Deer and Merry Christmas Die Sets
Vintage Ornament and Tags #1 Die Set and Snowman Globe Die Set
Vintage Numbers, Snowman Globe Die Set and Gift Tag Die Set
Happy Shopping!
Lee Ann :)
Wednesday, December 10, 2014
Dazzling Ornament with Top Dog Dies
Good Morning!
Are you counting down to Christmas yet?? Hard to believe that it is only 15 days away-but who's counting?!!
We have some great inspiration and a new challenge up at Add a Little Dazzle this week to help you with those last minute cards. Here is this week's gorgeous photo. We are focusing on colors- white and gold!
Beautiful, isn't it? These were the perfect colors for a CAS card~
I used Glimmering Gold Add a Little Dazzle Craft Metal for my ornament die cut. It gives such a gorgeous shine and looks just like a gold glass ornament, imo! But I am getting ahead of myself.
I started with an oldie but goodie stamp set from SU, Peaceful Wishes. I heat embossed the branches in white in the top right corner of the card.
Then, to help the branches stand out ever so slightly, I used a brown Inktense watercolor pencil at the base of each pine needle.
Next, I used my Vintage Ornament and Tags #1 Die Set from Top Dog Dies to cut out the intricate, cut decorative piece from Glimmering Gold Craft Metal. To make a ball ornament instead of the vintage ornament shape, I cut my Glimmering Gold Craft Metal with the circle die from the Top Dog Dies Snowman Globe Set. I also trimmed the intricate, decorative piece with the circle die so it was the perfect size for the ball ornament. Crystal Effects works beautifully to glue the two pieces together.
I used the silver back of an Add a Little Dazzle Craft Metal Sheet to die cut the hook holder 'thingie'. Seriously, do those things have a name??
When assembling the card, I added an extra layer between card base and image layer. I used some vellum and dragged the edges through a Versamark pad and then gold embossed the edges of the panel. The sentiment is also embossed in gold. I added the scrumptious seam binding ribbon and called it done!
I am linking up to the Merry Monday Challenge this week- use gold, silver, white and a 4th color (I chose brown)~
Hop on over to the Add a Little Dazzle Blog and check out all of the gorgeous inspiration from the
We hope you can join us this week!
Have a blessed week!
Lee Ann :)
Are you counting down to Christmas yet?? Hard to believe that it is only 15 days away-but who's counting?!!
We have some great inspiration and a new challenge up at Add a Little Dazzle this week to help you with those last minute cards. Here is this week's gorgeous photo. We are focusing on colors- white and gold!
Beautiful, isn't it? These were the perfect colors for a CAS card~
I used Glimmering Gold Add a Little Dazzle Craft Metal for my ornament die cut. It gives such a gorgeous shine and looks just like a gold glass ornament, imo! But I am getting ahead of myself.
I started with an oldie but goodie stamp set from SU, Peaceful Wishes. I heat embossed the branches in white in the top right corner of the card.
Then, to help the branches stand out ever so slightly, I used a brown Inktense watercolor pencil at the base of each pine needle.
Next, I used my Vintage Ornament and Tags #1 Die Set from Top Dog Dies to cut out the intricate, cut decorative piece from Glimmering Gold Craft Metal. To make a ball ornament instead of the vintage ornament shape, I cut my Glimmering Gold Craft Metal with the circle die from the Top Dog Dies Snowman Globe Set. I also trimmed the intricate, decorative piece with the circle die so it was the perfect size for the ball ornament. Crystal Effects works beautifully to glue the two pieces together.
I used the silver back of an Add a Little Dazzle Craft Metal Sheet to die cut the hook holder 'thingie'. Seriously, do those things have a name??
When assembling the card, I added an extra layer between card base and image layer. I used some vellum and dragged the edges through a Versamark pad and then gold embossed the edges of the panel. The sentiment is also embossed in gold. I added the scrumptious seam binding ribbon and called it done!
I am linking up to the Merry Monday Challenge this week- use gold, silver, white and a 4th color (I chose brown)~
and the Inspiration Challenge at Addicted to Stamps and More~
And, since I went uber bling'y' with the shiny, elegant craft metal, I am linking up to this week's Simon Says Stamp Wednesday Challenge blog, Bling it On!
Hop on over to the Add a Little Dazzle Blog and check out all of the gorgeous inspiration from the
Design Team, then why not play along! You don't have to use Add a Little Dazzle
Craft Metal, but if you have it we would love to see it!
Wanting to have your own Add a Little Dazzle Craft Metal to play with?
You can purchase yours HERE! I thank you in
advance as I get credit for your order.
THANK YOU!
We hope you can join us this week!
Have a blessed week!
Lee Ann :)
Thursday, December 4, 2014
It's December with Top Dog Dies!
Hi Everyone!
I'm back with more inspiration from Top Dog Dies. I used the fabulous Darling Deer Die for this card~
I die cut the deer from red cs and then heat embossed it with a snowflake image. Using the inlaid die technique, I then added the die cut to the negative die space on a piece of white cs. I secured the die with some washi tape on the back. The words 'Merry Christmas' were then die cut from the panel (with Darling Deer Die inset) and then again die cut from grey cs. The words 'Merry Christmas' were then placed, also using the inlaid die technique.
Bling to the antlers gives some fun sparkle to the card.
I think this is my favorite color combo for Christmas this year. How about you? Do you have a favorite color combo this season?
I am linking this card up to Simon Says Stamp Wednesday Challenge, which is Christmas!
Thanks so much for stopping by!
Blessings,
Lee Ann :)
I'm back with more inspiration from Top Dog Dies. I used the fabulous Darling Deer Die for this card~
I die cut the deer from red cs and then heat embossed it with a snowflake image. Using the inlaid die technique, I then added the die cut to the negative die space on a piece of white cs. I secured the die with some washi tape on the back. The words 'Merry Christmas' were then die cut from the panel (with Darling Deer Die inset) and then again die cut from grey cs. The words 'Merry Christmas' were then placed, also using the inlaid die technique.
Bling to the antlers gives some fun sparkle to the card.
I think this is my favorite color combo for Christmas this year. How about you? Do you have a favorite color combo this season?
I am linking this card up to Simon Says Stamp Wednesday Challenge, which is Christmas!
Thanks so much for stopping by!
Blessings,
Lee Ann :)
Wednesday, November 26, 2014
Have a Dazzling Thanksgiving!
Hi Everyone!
Hoping everyone has a Happy Happy Thanksgiving! If you are not spending all of your free time shopping for bargains, why not join us at Add a Little Dazzle for this week's newest challenge? The Design Team is embossing this week, using stencils.
Here is your inspiration photo~
I used a piece of Midnight Blue (love that color!) Add a Little Dazzle Craft Metal, clear embossing paste, Martha Stewart Fine Glitter and my Add a Little Dazzle Mosaic Swirls Background Stainless Steel Stencil. I have to say, this is my only stainless stencil and WOW, what a difference from plastic stencils. It is super sturdy- no shifting of the stencil or anything!
So, first I embossed the metal, using the stencil and suede and paper stump from The Basic Embossing Tool Kit. Once I had dry embossed the entire image, I embossed again, this time using clear embossing paste. I added a good amount of glitter to the entire embossed area, shook off the loose glitter and let the whole thing dry.
My snowy landscape was cut freehand and glittered with Stampendous' glitter. The deer is cut using the Top Dog Dies Darling Deer Die.
Admittedly, I had different plans for this stencil in the beginning. But, once I got started, what I saw with this stencil and Midnight Blue Metal was a night sky. To me, the glitter gives the sky a Northern Lights appearance. I love how it turned out!
Hoping everyone has a Happy Happy Thanksgiving! If you are not spending all of your free time shopping for bargains, why not join us at Add a Little Dazzle for this week's newest challenge? The Design Team is embossing this week, using stencils.
Here is your inspiration photo~
I used a piece of Midnight Blue (love that color!) Add a Little Dazzle Craft Metal, clear embossing paste, Martha Stewart Fine Glitter and my Add a Little Dazzle Mosaic Swirls Background Stainless Steel Stencil. I have to say, this is my only stainless stencil and WOW, what a difference from plastic stencils. It is super sturdy- no shifting of the stencil or anything!
So, first I embossed the metal, using the stencil and suede and paper stump from The Basic Embossing Tool Kit. Once I had dry embossed the entire image, I embossed again, this time using clear embossing paste. I added a good amount of glitter to the entire embossed area, shook off the loose glitter and let the whole thing dry.
My snowy landscape was cut freehand and glittered with Stampendous' glitter. The deer is cut using the Top Dog Dies Darling Deer Die.
Admittedly, I had different plans for this stencil in the beginning. But, once I got started, what I saw with this stencil and Midnight Blue Metal was a night sky. To me, the glitter gives the sky a Northern Lights appearance. I love how it turned out!
I sure hope you can join us this week! As always, there is a prize involved!
You do not need to use craft metal, but if you have it, we would LOVE to see it!
edit-I am linking this card up to the End of Term Blog Hop over at Mynn's House of Cards.
Thinking you want to purchase Add a Little Dazzle Craft Metal or embossing supplies for yourself?
You can do so HERE. I thank you in advance as I will get credit for
your purchase.
THANK YOU!
And, in case you need a little more incentive, Monica at Add a Little Dazzle is having
lots of Black Friday specials, including brand new product and Freebies!
HAPPY THANKSGIVING!
Lee Ann :)
Sunday, November 23, 2014
Tag- You're It!
Hello Everyone!
Just a quick post today as I am having computer trouble. I have used one Top Dog Dies Tag Die to make 3 very different Christmas tags. The first is CAS and rustic - I used the new Tag Die and the Snowman Globe Die, along with a Stampin Up Woodgrain Background Stamp. The trees are inlaid in the tag.
I used the same two dies for this snowman tag. In addition, the mound of snow is from the Darling Deer Die Set. I gave this sweet guy a felt hat!
The last tag is a bit vintage; I achieved this with some great dp from Theresa Collins. For this tag I used the Snowman Globe Die to cut the circle and the Vintage Numbers Die along with the Tag Die.
I love this new Tag Die! Not only does it make great tags, but it is great for layering! But that is another post!
Thanks for stopping by!
Lee Ann :)
Just a quick post today as I am having computer trouble. I have used one Top Dog Dies Tag Die to make 3 very different Christmas tags. The first is CAS and rustic - I used the new Tag Die and the Snowman Globe Die, along with a Stampin Up Woodgrain Background Stamp. The trees are inlaid in the tag.
I used the same two dies for this snowman tag. In addition, the mound of snow is from the Darling Deer Die Set. I gave this sweet guy a felt hat!
The last tag is a bit vintage; I achieved this with some great dp from Theresa Collins. For this tag I used the Snowman Globe Die to cut the circle and the Vintage Numbers Die along with the Tag Die.
Thanks for stopping by!
Lee Ann :)
Thursday, November 20, 2014
What's the Word with Top Dog Dies?
Hello Again!
Top Dog Dies has released MORE dies! Wow, I love the word dies they are coming out with! They have the great seasonal ones- Give Thanks and Merry Christmas- and now they have all occasion ones as well.
I paired the Top Dog Dies Cool Cats Die Set with two new Die Sets- Hello Die Set and the fabulous Gift Tag Die Set! I also created a frame using the brand new Thank You Die Set. I thought the sequins made such a cute collar!
I used to think I could not make a card without stamping, but these dies make it so easy- and quick!
Thanks so much for stopping by!
Stay warm, everyone!
Lee Ann :)
Top Dog Dies has released MORE dies! Wow, I love the word dies they are coming out with! They have the great seasonal ones- Give Thanks and Merry Christmas- and now they have all occasion ones as well.
I paired the Top Dog Dies Cool Cats Die Set with two new Die Sets- Hello Die Set and the fabulous Gift Tag Die Set! I also created a frame using the brand new Thank You Die Set. I thought the sequins made such a cute collar!
I used to think I could not make a card without stamping, but these dies make it so easy- and quick!
Thanks so much for stopping by!
Stay warm, everyone!
Lee Ann :)
Thursday, November 13, 2014
An Advent Calendar with Top Dog Dies
Hello All!
We are barreling towards Thanksgiving and then Christmas will be upon us! I got ahead of the craziness and made an Advent Calendar using CutCardStock and dies from Top Dog Dies.
I love how this turned out! Using my We R Memory Keepers Gift Box Punch Board made this an easy peasy project.
I used 12 x 12 Basis cardstock from CutCardStock; it is the perfect weight for the boxes and has a bit of texture. I cut the cardstock into 6 x 6 squares.
Then it was a matter of punching and scoring 24 pieces of paper; once this was done, I stamped approximately 2/3 of the boxes with Sweet 'n Sassy Stamps' Music Background Stamp. For a wonderful shimmer, I stamped them with Delicata Gold Ink.
Next, I die cut the numbers using the Vintage Numbers Die Set from Top Dog Dies. For even more holiday sparkle, I used the Curious Metallic cardstock from CutCardStock for the numbers.
I also added a few embellishments using the Top Dog Dies Darling Deer Die Set, Snowman Globe Die Set and Merry Christmas Die Set.
I painted a stick I found in my backyard- first I spray painted it with Bronze paint, then I sponged it with white and gold acrylic craft paint. The boxes were all tied up with twine and then tied to the branch.
I just love how this turned out. I have always admired people who just grab some item from nature and do amazing things with it. I am thrilled with how all of the components came together here; even the greenery which I dug out of the garage sale pile!
Well, on to other things on the Christmas 'to do' list!
Thanks so much for stopping by!
Lee Ann :)
We are barreling towards Thanksgiving and then Christmas will be upon us! I got ahead of the craziness and made an Advent Calendar using CutCardStock and dies from Top Dog Dies.
I love how this turned out! Using my We R Memory Keepers Gift Box Punch Board made this an easy peasy project.
I used 12 x 12 Basis cardstock from CutCardStock; it is the perfect weight for the boxes and has a bit of texture. I cut the cardstock into 6 x 6 squares.
Then it was a matter of punching and scoring 24 pieces of paper; once this was done, I stamped approximately 2/3 of the boxes with Sweet 'n Sassy Stamps' Music Background Stamp. For a wonderful shimmer, I stamped them with Delicata Gold Ink.
Next, I die cut the numbers using the Vintage Numbers Die Set from Top Dog Dies. For even more holiday sparkle, I used the Curious Metallic cardstock from CutCardStock for the numbers.
I also added a few embellishments using the Top Dog Dies Darling Deer Die Set, Snowman Globe Die Set and Merry Christmas Die Set.
I painted a stick I found in my backyard- first I spray painted it with Bronze paint, then I sponged it with white and gold acrylic craft paint. The boxes were all tied up with twine and then tied to the branch.
I just love how this turned out. I have always admired people who just grab some item from nature and do amazing things with it. I am thrilled with how all of the components came together here; even the greenery which I dug out of the garage sale pile!
Well, on to other things on the Christmas 'to do' list!
Thanks so much for stopping by!
Lee Ann :)
Tuesday, November 11, 2014
A Little Watercolor with New Top Dog Dies
Hi Everyone!
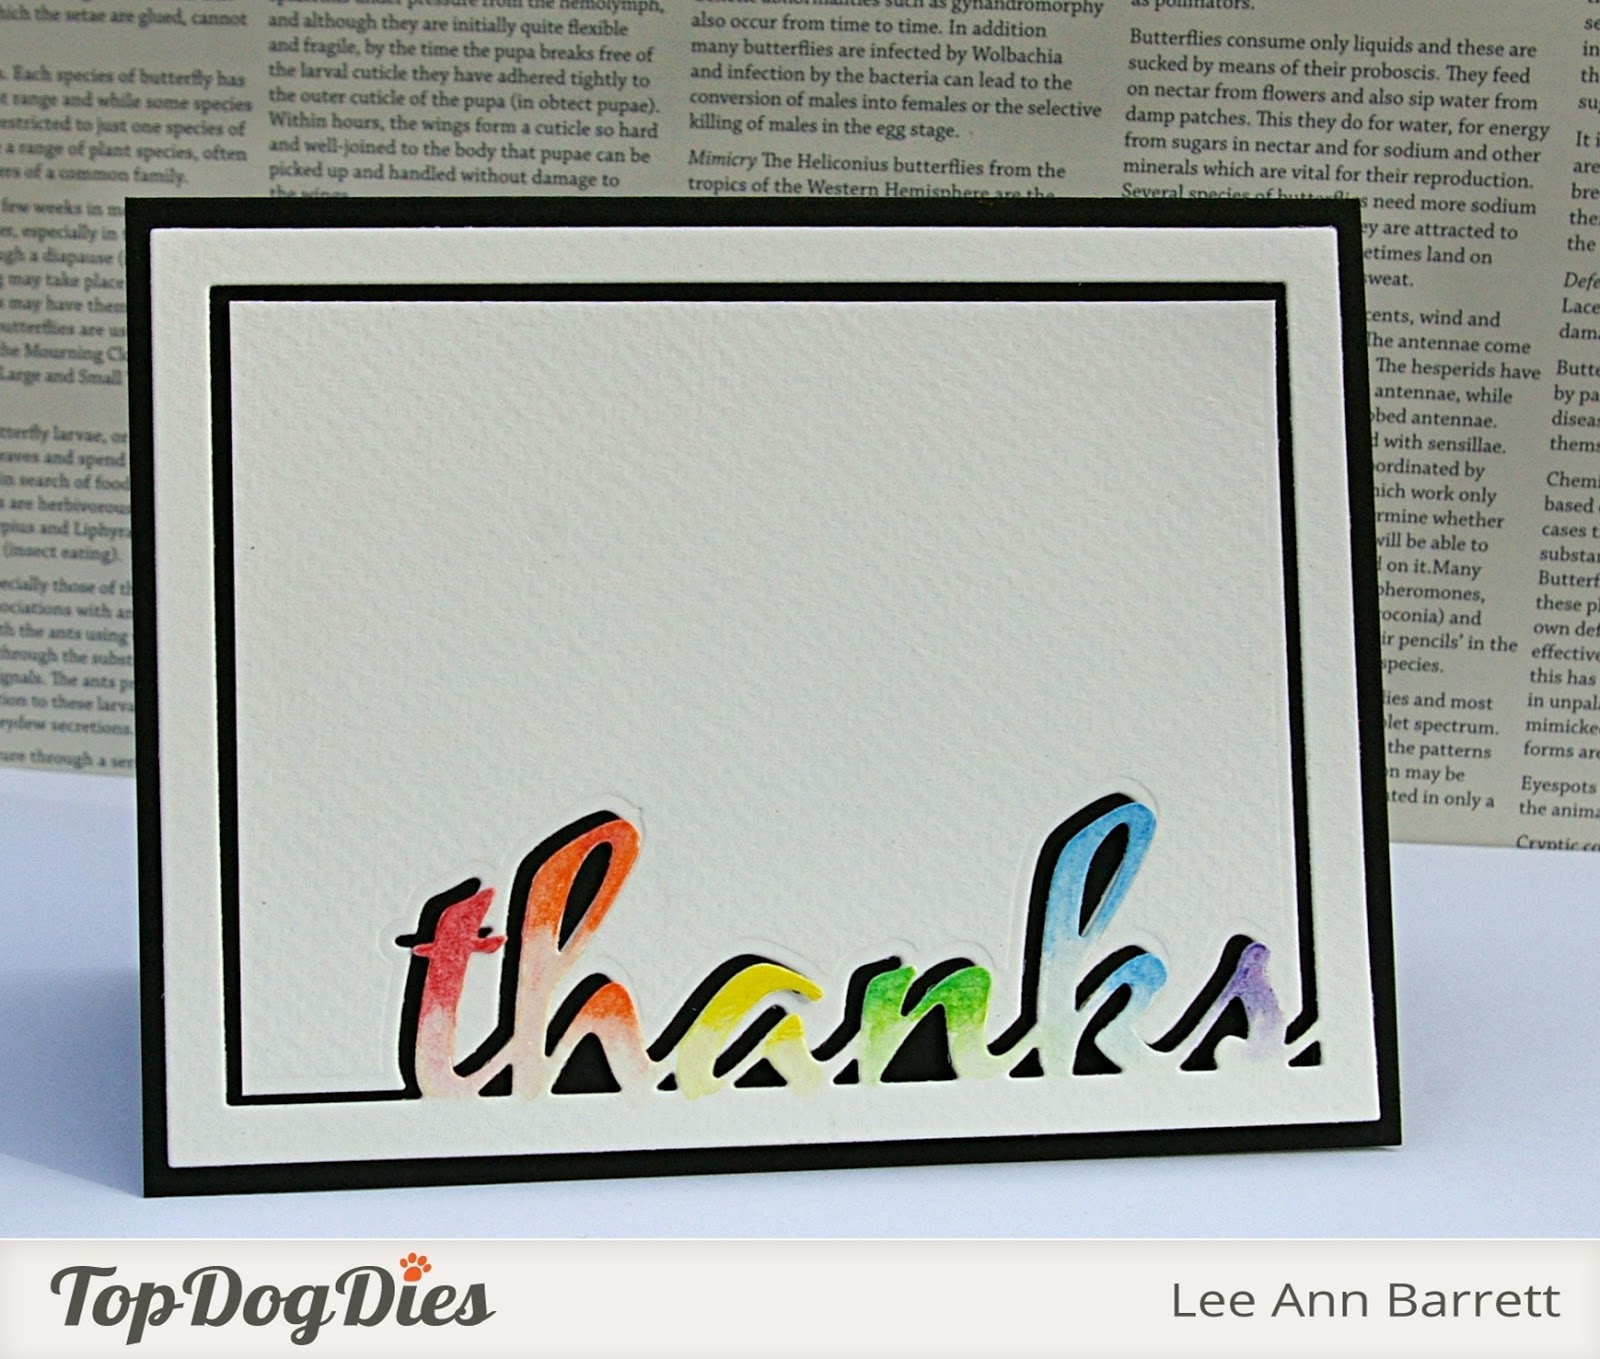
Top Dog Dies just released 6 more new die sets! This fantastic Thanks A2 Mat Die Set can be as simple or elaborate as you want. I went CAS with my first card~
I used watercolor paper for the Thanks A2 Mat Die; my Inktense Pencils have been neglected lately, so I got them out and did a little rainbow coloring as well as ombre technique on the word 'thanks'.
I kept the center of the die cut that would normally be discarded, and trimmed it down so that when I offset the word there would be a thin black outline around it.
I love that this is such a super simple card and yet packs a big punch!
Interested in this new die? You can check it out HERE!
Thanks so much for stopping by! I will be back Thursday with a Christmas project that you won't want to miss!
Lee Ann :)
Top Dog Dies just released 6 more new die sets! This fantastic Thanks A2 Mat Die Set can be as simple or elaborate as you want. I went CAS with my first card~
I used watercolor paper for the Thanks A2 Mat Die; my Inktense Pencils have been neglected lately, so I got them out and did a little rainbow coloring as well as ombre technique on the word 'thanks'.
I kept the center of the die cut that would normally be discarded, and trimmed it down so that when I offset the word there would be a thin black outline around it.
I love that this is such a super simple card and yet packs a big punch!
Interested in this new die? You can check it out HERE!
Thanks so much for stopping by! I will be back Thursday with a Christmas project that you won't want to miss!
Lee Ann :)
Thursday, November 6, 2014
Let It Snow- Globe!
Hi Everyone!
I am sharing more inspiration with Top Dog Dies today. I am using the adorable, new die, Snowman Globe Die Set, as well as the new Signature Die, Beatrix.
I turned the snow globe into a shaker card, going with gold and a pop of pink color. I wanted this to be a 'Mrs. Snowman', so instead of a top hat (which is included in the die set), I fashioned a stocking cap from what is actually a bandana from the Top Dog Dies Darling Deer Die Set.
The snow globe is backed with a layer cut with the Top Dog Dies Signature Die Beatrix. I stamped snowflakes, using the Spectacular Snowflakes Stamp Set from Sweet 'n Sassy Stamps, around the edge of the die cut and then ran the edges across a Versamark stamp pad and heat embossed with gold ep.
Once the snowflake panel was complete, I die cut a circle using the circle shape from the Top Dog Dies Snowman Globe Set, and then placed the snow globe on the background, fitting the globe into the die cut circle so that it was recessed. The snowflake panel is popped up on dimensionals.
I added an embossed sentiment (from Sweet 'n Sassy Stamps) and a SU baker's twine bow.
I am entering this in the 613 Avenue Create Challenge this week, Holiday Thanks.
The Challenge at Great Impressions this month is 'Thankful Thoughts'.
I am sharing more inspiration with Top Dog Dies today. I am using the adorable, new die, Snowman Globe Die Set, as well as the new Signature Die, Beatrix.
I turned the snow globe into a shaker card, going with gold and a pop of pink color. I wanted this to be a 'Mrs. Snowman', so instead of a top hat (which is included in the die set), I fashioned a stocking cap from what is actually a bandana from the Top Dog Dies Darling Deer Die Set.
The snow globe is backed with a layer cut with the Top Dog Dies Signature Die Beatrix. I stamped snowflakes, using the Spectacular Snowflakes Stamp Set from Sweet 'n Sassy Stamps, around the edge of the die cut and then ran the edges across a Versamark stamp pad and heat embossed with gold ep.
Once the snowflake panel was complete, I die cut a circle using the circle shape from the Top Dog Dies Snowman Globe Set, and then placed the snow globe on the background, fitting the globe into the die cut circle so that it was recessed. The snowflake panel is popped up on dimensionals.
I added an embossed sentiment (from Sweet 'n Sassy Stamps) and a SU baker's twine bow.
I am entering this in the 613 Avenue Create Challenge this week, Holiday Thanks.
The Challenge at Great Impressions this month is 'Thankful Thoughts'.
If you love this Snowman Globe Die, you can purchase it HERE.
If you love the Signature Beatrix Die, you can purchase it HERE.
If you are interested in the Darling Deer Die Set, you can purchase it HERE.
If you make a purchase from Top Dog Dies, I thank you in advance as I get credit for your purchase.
THANK YOU!
Thanks so much for stopping by!
Have a blessed week!
Lee Ann
Supplies Used-
Stamps-Sweet 'n Sassy Stamps Spectacular Snowflakes
Paper-Crate Paper dp, SU Brushed Gold, white cs, vellum, clear cardstock, 2 shades of unknown pink
Ink-Versamark, Crumb Cake
Other-Snowman Glob Die Set, Beatrix Signature Die and Darling Deer Die from Top Dog Dies, Gold ep, SU baker's twine, dimensionals, sequins
Thursday, October 30, 2014
Let's Talk Turkey with Top Dog Dies!
Hi Everyone!
Can you believe tomorrow is Halloween?? Time to start thinking Thanksgiving! I LOVE Thanksgiving. And just in time for the season, Top Dog Dies has a brand new die set perfect for Thanksgiving cards- Turkey Time.
This die set cracks me up! No matter how I looked at it, all I could think was comical. So I went with it! I used the new Scalloped Frame and Mat Die Set from Top Dog Dies to frame my goofy gobblers.
I stamped my Bermuda Bay cs with SU's Hardwood background stamp and then die cut the Top Dog Die Scalloped Frame from it. I die cut the frame from Pumpkin Pie cs as well, trimmed the scalloped edges from it and adhered the scallops to the Bermuda Bay frame.
Three turkey heads were cut, along with their 'parts', and googlie eyes were added. How can you not put googlie eyes on these guys??!
A banner with my sentiment, a button and some white baker's twine finish it off!
Can you believe tomorrow is Halloween?? Time to start thinking Thanksgiving! I LOVE Thanksgiving. And just in time for the season, Top Dog Dies has a brand new die set perfect for Thanksgiving cards- Turkey Time.
This die set cracks me up! No matter how I looked at it, all I could think was comical. So I went with it! I used the new Scalloped Frame and Mat Die Set from Top Dog Dies to frame my goofy gobblers.
I stamped my Bermuda Bay cs with SU's Hardwood background stamp and then die cut the Top Dog Die Scalloped Frame from it. I die cut the frame from Pumpkin Pie cs as well, trimmed the scalloped edges from it and adhered the scallops to the Bermuda Bay frame.
Three turkey heads were cut, along with their 'parts', and googlie eyes were added. How can you not put googlie eyes on these guys??!
A banner with my sentiment, a button and some white baker's twine finish it off!
Interested in purchasing your own Turkey Time Die Set fromTop Dog Dies? You can get yours HERE.
Thank YOU!
Challenges that I am posting this card to-
Simon Says Stamp Wednesday Challenge - 'Anything Goes'
Inspirational Challenges- Inspiration challenge~ I was inspired by multiple birds inside a 'box'. I have no owls (never took to the owl trend!) so used my silly turkey!
Thanks so much for stopping by and have a blessed weekend!
Lee Ann :)
Thursday, October 23, 2014
More Inspiration with the Top Dog Dies Fall Foliage Dies
Hello All and Happy Thursday!
I have been noticing some really amazing wreaths on Pinterest lately and was inspired to make a wreath using the Top Dog Dies Fall Foliage Dies. Yes, I know, I have been using these dies for a lot of projects. I cannot seem to help myself; I LOVE fall and these dies are the perfect size- even for my wreath!
This was actually a very simple project. I picked up a variety of felt squares and this sweet little wreath from Joanne Fabrics. I simply die cut my leaves and hot glued them in place once I was happy with their placement.
While you cannot see it in this photo, the embossed leaf veins even show up on the felt- very cool! I love burlap and that seemed like the go-to bow to finish the wreath.
Top Dog Dies has a special going on right now, through October 26th- get the 3 piece Fall Foliage Die Set FREE with any $50 purchase! Thanks in advance if you make a purchase through the link here as I get credit for your purchase.
That's it for me today; I hope I have inspired you to create!
Thanks for stopping by and have a blessed week!
Lee Ann :)
I have been noticing some really amazing wreaths on Pinterest lately and was inspired to make a wreath using the Top Dog Dies Fall Foliage Dies. Yes, I know, I have been using these dies for a lot of projects. I cannot seem to help myself; I LOVE fall and these dies are the perfect size- even for my wreath!
This was actually a very simple project. I picked up a variety of felt squares and this sweet little wreath from Joanne Fabrics. I simply die cut my leaves and hot glued them in place once I was happy with their placement.
While you cannot see it in this photo, the embossed leaf veins even show up on the felt- very cool! I love burlap and that seemed like the go-to bow to finish the wreath.
Top Dog Dies has a special going on right now, through October 26th- get the 3 piece Fall Foliage Die Set FREE with any $50 purchase! Thanks in advance if you make a purchase through the link here as I get credit for your purchase.
Thank YOU!
That's it for me today; I hope I have inspired you to create!
Thanks for stopping by and have a blessed week!
Lee Ann :)
Saturday, October 18, 2014
Top Dog Dies 'Leaves' You Loving Fall!
Hello Everyone!
Have I mentioned how much I love fall? :) It is the prettiest weekend and we are starting to see glorious fall color. I have used some brand new Top Dog Dies for this week's TDD inspiration. My inspiration comes from the beautiful trees outside! :)
These brand new Fall Foliage Dies from Top Dog Dies are just the best! Not too big and not too small, perfect for embellishing your cards or making them the main focus of your cards. The leaves were simply die cut from cs and sponged around the edges. Easy Peasy!
I have also used the brand new Top Dog Die, Signature Beatrix Die. Used for my top mat, I cut a circle from it and then using a Versamark marker and a slightly smaller circle template, I ran a line of Versamark ink just inside the cut line and heat embossed it with gold ep. Behind at is a stenciled forest made with a Crafter's Workshop stencil.
The bottom mat is embellished by running the edges of the cardstock over a Versamark pad and then heat embossing with gold ep. My sentiment, which is from Sweet 'n Sassy Stamps, is also embossed in gold ep and yes, I do LOVE the current gold' trend!
I borrowed the sketch from Lesley Croghan's, 'The Challenge'~
I love, love, love this sketch and can see myself using it over and over.
I just got a box of new SU goodies and could not wait to use the new gold baker's twine. Yep! GOLD!
Seeing as this is all about gorgeous fall colors, I am linking it up to the AAA challenge, 'Fall Colors'.
Tracy has a gorgeous fall Mood Board this month with some great gold inspiration!
I am also linking up to 613 Avenue Create for their 'Anything Goes or CAS' challenge this week and also with my newest challenge find, ScrapbookerPhD, Challenge 16- Fall with a Die Cut and a Stamp.
Thanks so much for stopping by and have a blessed weekend!
Lee Ann :)
Have I mentioned how much I love fall? :) It is the prettiest weekend and we are starting to see glorious fall color. I have used some brand new Top Dog Dies for this week's TDD inspiration. My inspiration comes from the beautiful trees outside! :)
These brand new Fall Foliage Dies from Top Dog Dies are just the best! Not too big and not too small, perfect for embellishing your cards or making them the main focus of your cards. The leaves were simply die cut from cs and sponged around the edges. Easy Peasy!
I have also used the brand new Top Dog Die, Signature Beatrix Die. Used for my top mat, I cut a circle from it and then using a Versamark marker and a slightly smaller circle template, I ran a line of Versamark ink just inside the cut line and heat embossed it with gold ep. Behind at is a stenciled forest made with a Crafter's Workshop stencil.
The bottom mat is embellished by running the edges of the cardstock over a Versamark pad and then heat embossing with gold ep. My sentiment, which is from Sweet 'n Sassy Stamps, is also embossed in gold ep and yes, I do LOVE the current gold' trend!
I borrowed the sketch from Lesley Croghan's, 'The Challenge'~
I love, love, love this sketch and can see myself using it over and over.
I just got a box of new SU goodies and could not wait to use the new gold baker's twine. Yep! GOLD!
Seeing as this is all about gorgeous fall colors, I am linking it up to the AAA challenge, 'Fall Colors'.
Tracy has a gorgeous fall Mood Board this month with some great gold inspiration!
I am also linking up to 613 Avenue Create for their 'Anything Goes or CAS' challenge this week and also with my newest challenge find, ScrapbookerPhD, Challenge 16- Fall with a Die Cut and a Stamp.
Thanks so much for stopping by and have a blessed weekend!
Lee Ann :)
Thursday, October 16, 2014
Happy Birthday, Top Dog Dies!
Hi Everyone!
Top Dog Dies turned 1 year old this month; it seemed appropriate that my blog post and tutorial this month be for a birthday card.
The tutorial I am sharing on the Top Dog Dies Blog this week will actually allow you to make two cards. Here is my first card, made with the new Top Dog Dies Vintage Numbers Die Set and a piece of Add a Little Dazzle black craft metal sheet.
I die cut multiple numbers out in white card stock and adhered them to watercolor paper. I used this to emboss my craft metal sheet. The sentiment is from Sweet 'n Sassy Stamps.
I am linking this card up to the CAS on Sunday challenge, 'Emboss It', as well as Seize the Birthday, 'Anything Goes.
Once this card was completed, I used the numbered cardstock as a base for my second card~
Using reinkers, I watercolored the background. Once dry, I brayered color onto the numbers.
I framed the numbered background with the new Top Dog Dies Scalloped Frame and Mat Die Set, cut from vellum. The sentiment is from Sweet 'n Sassy Stamps and is embossed with black ep.
I cut banners and embellished with cheese cloth, a bow and Prima flowers.
I am linking this card up to The Mixed Media Card Challenge, 'Vintage'.
Thanks so much for stopping by! Have a blessed week!
Lee Ann :)
Top Dog Dies turned 1 year old this month; it seemed appropriate that my blog post and tutorial this month be for a birthday card.
The tutorial I am sharing on the Top Dog Dies Blog this week will actually allow you to make two cards. Here is my first card, made with the new Top Dog Dies Vintage Numbers Die Set and a piece of Add a Little Dazzle black craft metal sheet.
I die cut multiple numbers out in white card stock and adhered them to watercolor paper. I used this to emboss my craft metal sheet. The sentiment is from Sweet 'n Sassy Stamps.
I am linking this card up to the CAS on Sunday challenge, 'Emboss It', as well as Seize the Birthday, 'Anything Goes.
Once this card was completed, I used the numbered cardstock as a base for my second card~
Using reinkers, I watercolored the background. Once dry, I brayered color onto the numbers.
I framed the numbered background with the new Top Dog Dies Scalloped Frame and Mat Die Set, cut from vellum. The sentiment is from Sweet 'n Sassy Stamps and is embossed with black ep.
I cut banners and embellished with cheese cloth, a bow and Prima flowers.
I am linking this card up to The Mixed Media Card Challenge, 'Vintage'.
Thanks so much for stopping by! Have a blessed week!
Lee Ann :)
Subscribe to:
Posts (Atom)