Wednesday, July 11, 2018

SSS Wednesday Challenge with Mama Elephant!

wed-newchallenge-header

 Hello Again! It is time for a new Simon Says Stamp Wednesday Challenge!

wed-designerspotlight-header
 I am joining the team again this week, with the featured product being Mama Elephant!

https://www.simonsaysstampblog.com/wednesdaychallenge/

  The challenge this week is 'Fun in the Sun'! 


Summer is full of outdoor activities, including parades! Those of us in the U.S. just experienced that with last week's Independence Day celebrations.  I could not resist these adorable parading critters from the Mama Elephant Animal Parade Stamp Set.  They are colored with Copics.  I did a little cutting outside of the box with my critter panel and used  My Favorite Things Peek A Boo Polka Dots die to back the panel.  The first background panel was cut in a lime green paper.  I cut a second panel in aqua color and popped up a few of the dots on Scotch Double Sided Foam Tape; my image panel is also popped up on the dimensional tape.  I added some sparkle with my Zig Wink of Stella clear glitter marker to the aqua dots as well as parts of the colored image.

50dollar_voucher_600px
Simon Says Stamp generously provides a $50 dollar gift certificate each week so be sure to get your entry in for a chance to win!

Simon Says Stamp

Thanks so much for stopping by and have a wonderfully crafty week!

Lee Ann 

Week One of Coloring with Stamplorations!

Hello, Hello!

Well this is an exciting month for me with not one but two opportunities to be a guest designer.
I am thrilled to be one of the featured guest designers at Stamplorations.   Today's Stamplorations blog post is all about coloring.  Want to see some gorgeous stuff?  3 colorists, 3 cards each!  Check it out here. Who knows?? There may be a chance to win a $15 gift certificate to the Stamplorations store!  (wink, wink)
Warning!!  This is a very long post!  I have had requests in the past to provide some sort of a tutorial on how I color.  I thought I would try to do so here.  Having now done this, I can say it is very time consuming and effects how I work.  And you will get to see the oopsies! I would LOVE your feedback on the tutorial(s).  Too much, too confusing?  Thanks so much! 


I will start with this gorgeous French Marigold image; the flower is very sentimental to me as my mom used to plant these every summer.  I will try to show you step by step how I got here.

1.   If I want to color realistically, I start with googling the object.  I pick out some Copics that I think I might use.  As you can see, I already had stenciled and sponged a background, but it did not take long for me to realize that it wasn't working for me. 


2.  Put down initial color of Y17.


3.  When I don't have the exact color I want, I will layer markers.  Here, I start with YR24.


4.  Now on top of the YR 24, I layer R05. 


5.  And on top of the R05 I decide to layer Y17. 


6.  Next,  I start adding in contrast to give the petals shape.  Here I have used R46 and softened the lines with the R05.  I also start blocking in some shadows.


7. Petals are finished with the same colors as above. 


8.  I choose a photo to use as a guide for the two remaining flowers.


9.  Quick base coat of Y13 goes down. 


10.  I start adding in some Y15 to give shape and definition to the petals.


11.  Y19 is next, to start adding depth. 


12.  I used Y11 to blend the Y15 and Y19.  I used Y11 because I did not want the yellow to get too dark. 


13.  Shadow areas are darked with YR14. 


14.  E47 is used for the shadows and then is blended out with the YR14. 


15.  Depth is added to the shadows with  W1, E43 (my W3 was out of commission), and E74.
More definition is added with the Y13 and Y19. 


And that is a brief synopsis of how I got here.  I fussy cut the flowers out and popped them up on dimensionals in the finished card.  The sentiment is from the Best Mom Ever stamp set.


I am linking my Marigold card up to the ModSquad Challenge, which is 'flowers'.

I will post my next to cards here, and if you would like the tutorials on them, scroll on down.


I have used In Bloom- Precious Plumeria and this fabulous sentiment set- Fond Expressions.  I absolutely love the fonts in this set.


And last but not least, I have used Blooming Buds (I love the versatility of this set) and Birds and Blooms for the sentiment.
If you want tutorials on these cards keep on scrolling!

Lee Ann

Plumeria card

1. Get photo reference.


 2.  Start with basic blocking in of color- Y11 and RV10.


3.  Start to deepen the yellow color with Y15, blending out with Y11.


4.  Add more intense color with Y38.


5. Add most intense color with YR68 and then go over with Y11 to soften lines.


6.  Use RV13 and RV14 on the edges of the petals.  Use W1 to start adding shadows.


7.  Use YG23, G07 and G28 for leaves.


8.  Use RV13 and RV14 on the small flowers.


9.  Blend out RV 13 and RV14 with RV02. 


And lastly~

1.  Stamp image, using the masking technique.


2.  Mask off the images and sponge an ombre background. 


3.  Lay down inital color of G20 and YG21.


4. Add YG23 to base of petals and blend out with G20.


5.  Use 07 and YG03 for the stem and use G17 for the top of the stem.


That one was easy!


Sunday, July 8, 2018

Serene Seaside

Hello and Happy Sunday Everyone!

We have been HOT, HOT, HOT here in St Louis as much of the U.S. has been.  Staying cool is the name of the game.  And while I am not headed to the beach anytime soon, I can at least dream about it and use some Technique Junkies Stamps to create my own little seaside scene!  Stamps are 10% off with code TJ10LeeAnn.


I cannot lie, I absolutely love how this turned out.  And the best part?  The sponged ombre background was in my stash just waiting to be used.  I stamped the longer of the two sand and shell images in the Technique Junkies Seashell Borders Stamp Set.  I wanted the border to have a little more depth, so I added my own mounds of stand in the forefront of the image.  I colored the image with Copics, and then, yes, fussy cut it out.
The rest is pretty self explanatory- I die cut the background with a MFT scalloped frame die, rotated the scalloped frame around the rest of the background and adhered to a kraft card base.  The sentiment, Kisses the Shoreline, was stamped using my MISTI for perfect placement.  I was also able to double stamp the sentiment to get a nice solid black lettering.
The shell image was popped up on dimensional tape and a few sequins were added for sparkle.

That's it for me!  Remember that if you shop, the code TJ10LeeAnn will get you 10% off your entire cart (excluding clearance items).


Have a blessed day!
Lee Ann  

Wednesday, July 4, 2018

SSS Wednesday Challenge!

Hello All!


wed-newchallenge-header

 I am over the moon thrilled and honored to be the
Simon Says Stamp Wednesday Challenge 
guest designer for July!
 wed-designerspotlight-header

The design team is featuring Simon Says Stamp products this week.

https://www.simonsaysstampblog.com/wednesdaychallenge/
  The challenge this week is a color challenge; use the colors White, Red, and/or Blue~


I have used the oh so fabulous SSS Beautiful Flowers for my card.  I stamped the image in Versafine black ink onto watercolor paper.  As I had not used my Derwent Watercolor Pencils in quite some time, I thought that given the details of this image, it would be a perfect time to pull them out.  I did put a base of blue and red color down, but there was not quite enough contrast, so I added to it with Peerless Watercolors.
Once I was happy with the flowers and the background, I turned my attention to the leaves.  As the challenge was red, white and blue, I could not add green, but I did not want to leave them plain, so I broke out my Sakura Gold Metallic Gelly Roll Pen and outlined the leaves and stems in gold.


I finished the card off with a surprise piece of contemporary designer paper; I love how it offsets the traditional floral spray.  Lastly, I added my favorite sequins, SSS Assorted Moonshine Sequins.  The sentiment is stamped in the Black Versafine Ink and the entire panel is popped up on the card base with 3M Scotch Double Sided Foam Tape.


Simon Says Stamp generously provides a $50 dollar gift certificate each week so be sure to get your entry in for a chance to win! 


50dollar_voucher_600px

Simon Says Stamp

Thanks so much for stopping by! Happy 4th of July to my American friends!  

Lee Ann

Sunday, July 1, 2018

July Release Technique Junkies Blog Hop

Hello!  It is July 1 and time for the Technique Junkies New Release Blog Hop!
We have lots of inspiration in store for you!  All new release stamps are 15% off through
July 8th- no code needed, discount will automatically be applied.Want something that is not in the release?  Use code TJ10LeeAnn to get a 10% discount on all other items (excluding clearance).

Let's get hopping!  If you came from Jeanne Streiff's blog, you are in the right place.
If not, you can start at the Technique Junkies Design Team Blog to view the entire hop. 

I am featuring two cards, two completely different styles, using the same stamp set.  The first card
goes back to my stamping roots- lots of layers and embellies~


The card is a mixed media card- I added texture beads to embossing paste and tinted it with reinkers.
Over some of that, I added white acrylic paint-sea foam- for my background.  You will notice that there is a circle die cut in the background.  The layer behind that is sponged.  My collage is made using the fabulous new Sea Shells, set of 5 Stamp Set.   The shells were stamped and fussy cut out. I layered cheese cloth, the shell images, stick pins, pearls and the beach and sea sentiments.  I loved using the 'sea' scrabble pieces as there were hand made and gifted to me by MariLynn DeGroot.

The second card is a CAS card~


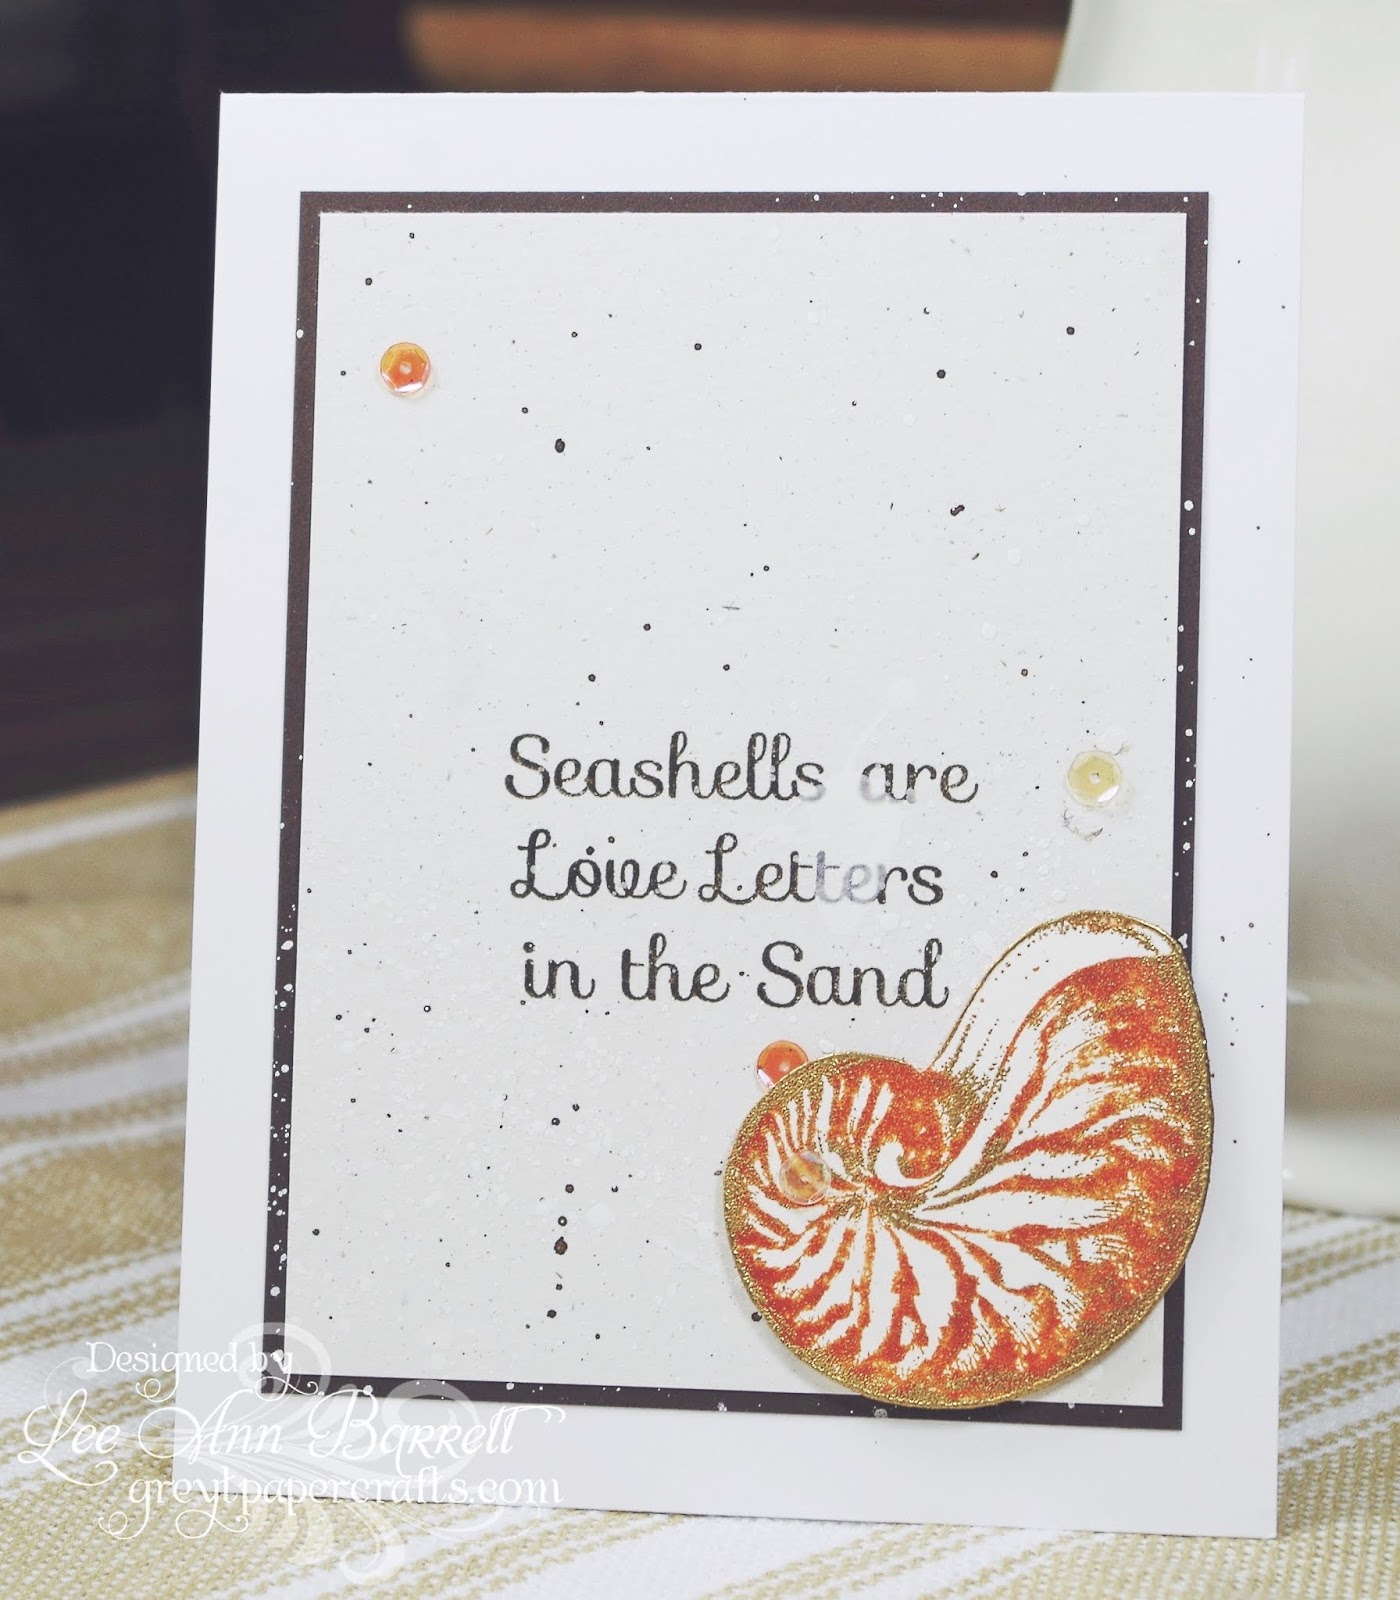
  I used the gorgeous nautilus shell, stamped it in a rust color, fussy cut it out and then embellished it with gold embossing powder along the edges and in select places on the image.  My background is spattered with brown and white acrylic paints.

Now head over to Cheri's blog where she has some wonderful inspiration for you!  


Happy Hopping and Happy July 4th to my American friends!  

Lee Ann 
Related Posts Plugin for WordPress, Blogger...