Tuesday, December 21, 2021

Deer Thanks

 Hello Everyone! 

This will likely be my last post until after Christmas, so Merry Christmas to you All!  

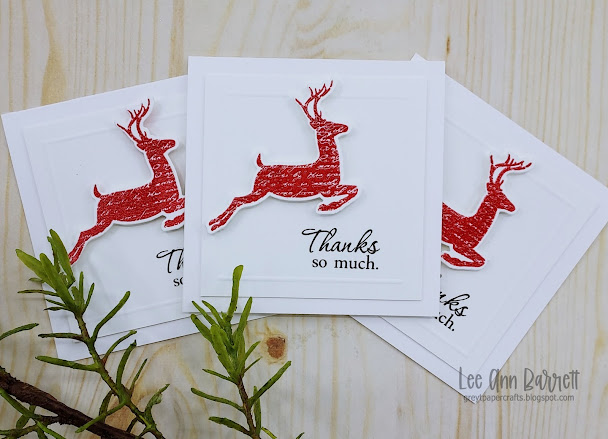
I made some simple Thanks cards for all of the sweet kiddos at school who got me Christmas gifts.  

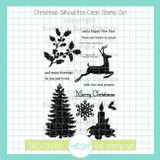
The Christmas Silhouettes Stamp Set and matching Dies make it easy to mass produce cards.  I stamped the image with red ink on Neenah Solar White cs, then heat embossed it with clear embossing powder.  The image was then die cut out.  Sentiment is from the Precious Poppies Stamp Set.  *Enabler ALERT*!!!  Sweet n Sassy Stamps has 25% off the entire store! 


The card size is 3.5 inches.  The scored panel is 3 inches.  the die cut deer are popped up on dimensional tape.  

That's it!  Easy Peasy! For once I did not complicate things! 

I am linking up to Tuesday Morning Sketches for their 'Anything Goes' Challenge. 

Have a very Merry Christmas Everyone!

Lee Ann 

Supplies used in today's project(s)

Copic Sketch Markers

SSS | Blick
3M Scotch ATG Advanced Tape Glider

SSS
Neenah Classic Crest 80# Ream Smooth Solar White Cardstock

SSS
Versafine Onyx Black Ink

SSS | scrpbk
Tonic Craft Guillotine Trimmer

SSS
Versamark Ink
Versamark Ink

SSS | scrpbk
Embossing Buddy
Embossing Buddy

SSS
Wagner Precision Heat Tool

SSS
SNSS Christmas Silhouettes Stamps

SnSS
SNSS Christmas Silhouettes Dies

SnSS

Monday, December 13, 2021

Snowy Scene

 Hello!  

Today the Impression Obsession team is cards with the theme of 'snow'.  

One of my all time favorite IO images is this gorgeous Snowy Branch Cardinal.  I deviated from my usual vibrant coloring, this time trying to go the soft, pastel route.  I colored the cardinal with Copics and then fussy cut him out.  


A Snowflake Background Die cut was added to a white card front.  The cardinal image was added, with dimension being added with some scraps of cs.  I decided against adding a sentiment as I am frequently needing a note card.  

Head over to the IO blog for more snowy inspiration! 

I am linking up to Make the Card Challenge- Winter, 

Simon Says Stamp Monday Challenge- Cold as Ice, 

and Sketch Saturday~


Lee Ann 


Supplies used in today's project(s)

Copic Sketch Markers

SSS | Blick
3M Scotch ATG Advanced Tape Glider

SSS
Neenah Classic Crest 80# Ream Smooth Solar White Cardstock

SSS
EK Success Cutter Bee Scissors

SSS | scrpbk
Tonic Craft Guillotine Trimmer

SSS


IO Snowy Branch Cardinal

IO
IO Snowflake Background Die

IO

Tuesday, December 7, 2021

Fluttering By with a New Kit!

 Hello Everyone!  

We are only a little over a couple of days out from Christmas- Woo Hoo!  We haven't had any snow here yet, but, this month's outstanding Spellbinders Card Kit of the Month has me dreaming of spring!  This kit is chock full of gorgeous butterflies- die cuts, layered die cuts, stickers and dies- all in a scrumptious color palette.  Lets start with this trio of beauties~


Aren't these just stuninng?! All I had to do was cut a piece of patterned paper, trim a die cut and use it to create an upper border for the paper, and then die cut a lacey border using the gold mirror cs in the kit.  Then all that was left to do was pop uf the butterflies on the included dimensional adhesive, adhere the die cut sentiment to the card and add a few pink sequins (also in the kit).  And, you have a stunning card! 


Next up, a neutral card made with the beautiful butterfly die~


I used some of the included patterned paper for a mat and then die cut my butterfly fronts from cream cs and the backs from neutral patterned paper.  I grounded the butterflies on a white strip of cs down the center of the card.  The sentiment strip was added (it is really black, but for some reason wanted to photograph as brown).  The results are stunning! 


And this may be my favorite card, and it uses multiple premade die cuts~


I used Versamark ink and a butterfly stamp from the set and watermarked a cream cs mat.  Next, I layered two fan shaped black and white die cuts and two floral die cuts, followed by another gorgeous butterfly.  I absolutely love how this turned out.  And I love the black and white die cuts!  Lastly, I stamped the sentiment on white cs and fussy cut it out.  It matches the pre-made die cuts perfectly.  A few clear sequins finish the card.  


And lastly, a super easy bonus card!  This comes together in minutes but is gorgeous with its color palette and sparkly die cuts.  


I added a bit of texture to the card base by clear heat embossing a butterfly stamp all over the panel.  


This kit does not disappoint!  And when you purchase a club kit in December, you get a free gift.  On top of that, there is no commitment.  You can cancel at any time.  

Thanks so much for stopping by and have a blessed week!

Lee Ann 


Supplies used in today's project(s)


Neenah Classic Crest 80# Ream Smooth Solar White Cardstock

SSS
Simon Says Stamp Assorted Moonshine Sequins

SSS
Versafine Onyx Black Ink

SSS | scrpbk
EK Success Cutter Bee Scissors

SSS | scrpbk
Tonic Craft Guillotine Trimmer

SSS
Versamark Ink
Versamark Ink

SSS | scrpbk
Embossing Buddy
Embossing Buddy

SSS
Gina K Connect Glue
Gina K Connect Glue

SSS
Wagner Precision Heat Tool

SSS
SB  Card Kit
SB Card Kit

Spellbinders

Monday, December 6, 2021

Doing Christmas with Die Cuts

 Hello, Hello!

Are you in the middle of all of the Christmas preparation?  I have all of my Christmas decor up and some gifts bought, but that is about it! I probably need more Christmas cards, like this week's Christmas cards with the focus on die cuts from Impression Obsession.  


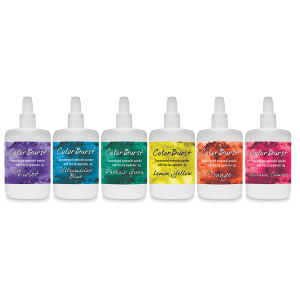
I love the simplicity of a monochromatic card.  I watercolored a piece of Tim Holtz water color paper with my Ken Oliver Colorbursts.  Once it was dry, I spattered some white acrylic paint on it.  I die cut the frame using the Birch Tree Rectangle Frame Die.  I also used the Bare Branch Die and the Spring Bird Die.  I can't seem to do a card without coloring, so I used the Berry Branch Stamp, stamped it on watercolor paper and colored it with the Ken Oliver Color Bursts for a tone on tone look.  

Believe it or not, Joy to the World was stamped in Versamark Ink and heat embossed with silver ep.  But, trying to photograph silver ep is impossible! 

I am linking up to The Paper Players for their Winter wonderland challenge. 

Head over to the Impression Obsession Blog for more Christmas die cut inspiration.  

Thanks for stopping by! 

Lee Ann


Supplies used in today's project(s)

""
Ken Oliver Color Burst Watercolor Powder

Blick
3M Scotch ATG Advanced Tape Glider

SSS
Neenah Classic Crest 80# Ream Smooth Solar White Cardstock

SSS
Simon Says Stamp Assorted Moonshine Sequins

SSS
EK Success Cutter Bee Scissors

SSS | scrpbk
Tonic Craft Guillotine Trimmer

SSS
Versamark Ink
Versamark Ink

SSS | scrpbk
Embossing Buddy
Embossing Buddy

SSS
Canson XL Watercolor Pad

SSS | Blick
Wagner Precision Heat Tool

SSS
IO Birch Tree Rectangle Frame Die

IO

IO Bare Branch Die

IO
IO Spring Bird Die
IO Spring Bird Die

IO
IO Berry Branch
IO Berry Branch

IO
Related Posts Plugin for WordPress, Blogger...